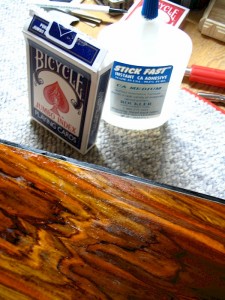
 To the left you can see the two things that I use to fill the pores in various woods, (in this case, Cocobolo), before applying the finish.
1. Medium viscosity CA glue.
2. A deck of playing cards.
What I do is drizzle the CA glue somewhat sparingly over the wood surface to be filled, (a little CA glue goes a long way), and then just use a playing card to level and spread the glue throughout the entire surface of the wood. I also use a box fan on my work table to prevent my eyes from watering up from the fumes.
I use shellac to seal the wood first, so less CA glue is wasted and absorbed into the wood fibers. (Multiple applications can sometimes be necessary.) And in this case, with Cocobolo, it was just about a necessity to seal the wood first, because Cocobolo’s colors will leach into the finish (or pore filler) and taint the nearby wood. In this case, the white lines on the purfling would’ve turned orange if I hadn’t (gingerly) sealed the wood before filling the pores.
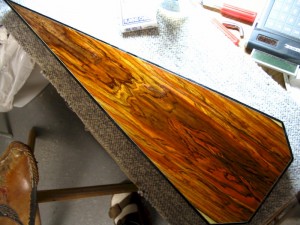
 To the left you can see the wood surface just after I’ve filled the pores. (The actual color is just a bit redder in person.) The surface will obviously be uneven, but once the CA glue is fully dried, I will go back over it with a cabinet scraper, and/or sandpaper and level things off. Once the wood’s pores are glassy smooth and filled to my liking, I like to let the entire psaltery sit overnight before starting to apply the finish. This ensures that all the solvents and chemicals within the CA glue won’t get trapped under the finish.
I love CA glue as a pore filler because, unlike most pore fillers which are colored, CA is completely transparent and lets the natural beauty of the wood show through.


Beautiful…I’m looking into using CA pore filling for my guitars.